Link:
https://dannyman.toldme.com/2020/01/29/stand-down-the-army-resilience-is-our-new-national-defense/
Thoughts during this morning’s commute.
The first thought was we should disband the standing Army. We don’t need one. A Navy, airpower, some Marines and special forces? Sure. We have a National Guard to respond to domestic emergencies. We probably want to maintain and modernize equipment in case we need a war. States can form militias if they like. We can find a lot of Americans who are fond of guns on short notice. If you want to carry a firearm, you get government training, and you’re eligible for the draft.
“Standing armies are dangerous to liberty.†–Alexander Hamilton
You can’t do it all at once. Closing bases and shutting off defense contractors retards economic activity. Twenty years. Spread money around impacted communities.
But what should the government be doing?
Defense wise, we need to focus on Information Security, and, for the main part, climate change and emergency preparedness. The enemy will not land on our shores and defeat us with missiles. They’ll hack our elections and take our power grid hostage. Between the threat of information warfare and climate change, we need resilient logistics. If all the computers crash tomorrow, can we get food between communities? Where does our military-industrial complex go? Logistics.
Rural communities ought to be able to assemble and maintain their own damn tractors and combine harvesters. Right now John Deere tells farmers they can’t fix their own equipment. The government could sponsor Open Source farm equipment and software. Every county ought to be able to assemble, maintain, and carry out most repairs on its farm equipment. Every region ought to have the capacity to build tractors and vehicles, end-to-end.
The US Army is not going to save the world from the threats it faces in this century. American leadership in finding ways to restore the atmosphere to health, while modeling how we can build resilient local communities is what needs to happen.
Feedback Welcome
Link:
https://dannyman.toldme.com/2020/10/19/stay-out-of-the-water/
In my career as a Boy Scout, I could have died at least twice, that I know of.
One time in the Boundary Waters, I got a tent that required stakes and guys, but we were effectively camping on ROCKS with a little bit of moss. So, I rolled a few boulders into the right spot to anchor the lines.
This was during the summer AFTER the worst of mosquito season.
I took a canoe out to paddle for fun one afternoon in this little lake but started to get sucked toward a waterfall. Luckily, there was someone nearby to toss a rope and haul me to shore.
Another time in Michigan, I stepped out of a canoe near a landing, and turned out it was deep water that was sucking me DOWN except for my life vest was secure and buoyant. Scoutmaster was near to haul me out of the water.
Honeymooning in Hawaii, I waded out on a beach to ride the waves to shore in shallow water, as I had often enjoyed in Lake Michigan. The surf picked me up, rolled me, and slammed me hard, skull into the sand. Coulda cracked my neck. I took it as a hint from the local deities that this continental tourist should stay onshore, as is my place in the world.
Feedback Welcome
Link:
https://dannyman.toldme.com/2020/11/15/basic-mobile-workbench-day-0/
I enjoy building things. I learned a few things in my uncle’s basement and Boy Scout activities, but my high school didn’t offer shop class. In college, I discovered computer programming, which allowed me to build computer programs quickly, with a fairly low cost-of-entry. Information Technology is also a lucrative career choice.
A few years back, my IT career, aided by the mortgage crisis, helped me achieve the impossible: we bought a house in Silicon Valley! Our one-car garage is just about perfect for anything but parking. I enjoyed puttering on small weekend projects, but soon we had first one kid and then two, and with that, no more free time for extended puttering.
My ambition has still been to have a little workshop where I could build some things. I found a local woodshop that offered classes. I got to build a spice rack. Then their rent went up, and the workshop closed. The classes moved to a local community college, whose administrative procedures leave much to be desired.
Besides, what I really wanted was to get set up at home. For the years of early parenthood, I lacked the time and energy, and often, the budget. The bootstrap from a messy garage to a functional workshop is daunting. After the kids are in bed, sit back in the rocking chair, and flip around YouTube videos.
YouTube served me up some woodworking videos. There’s a lot of dudes out there making things with resin. Whatever. Then Steve Ramsey came along, explaining all the bits and pieces of basic woodworking. Along the way, he gently hawks his online courses. You know, if his regular YouTube videos are so informative and engaging, maybe the $150, what you might expect to pay for a weekend workshop or two at the local shop, might be worth a shot.

With my COVID haircut, flannel shirt, and eyeglasses fit over safety glasses, I am ready to rock the shop!
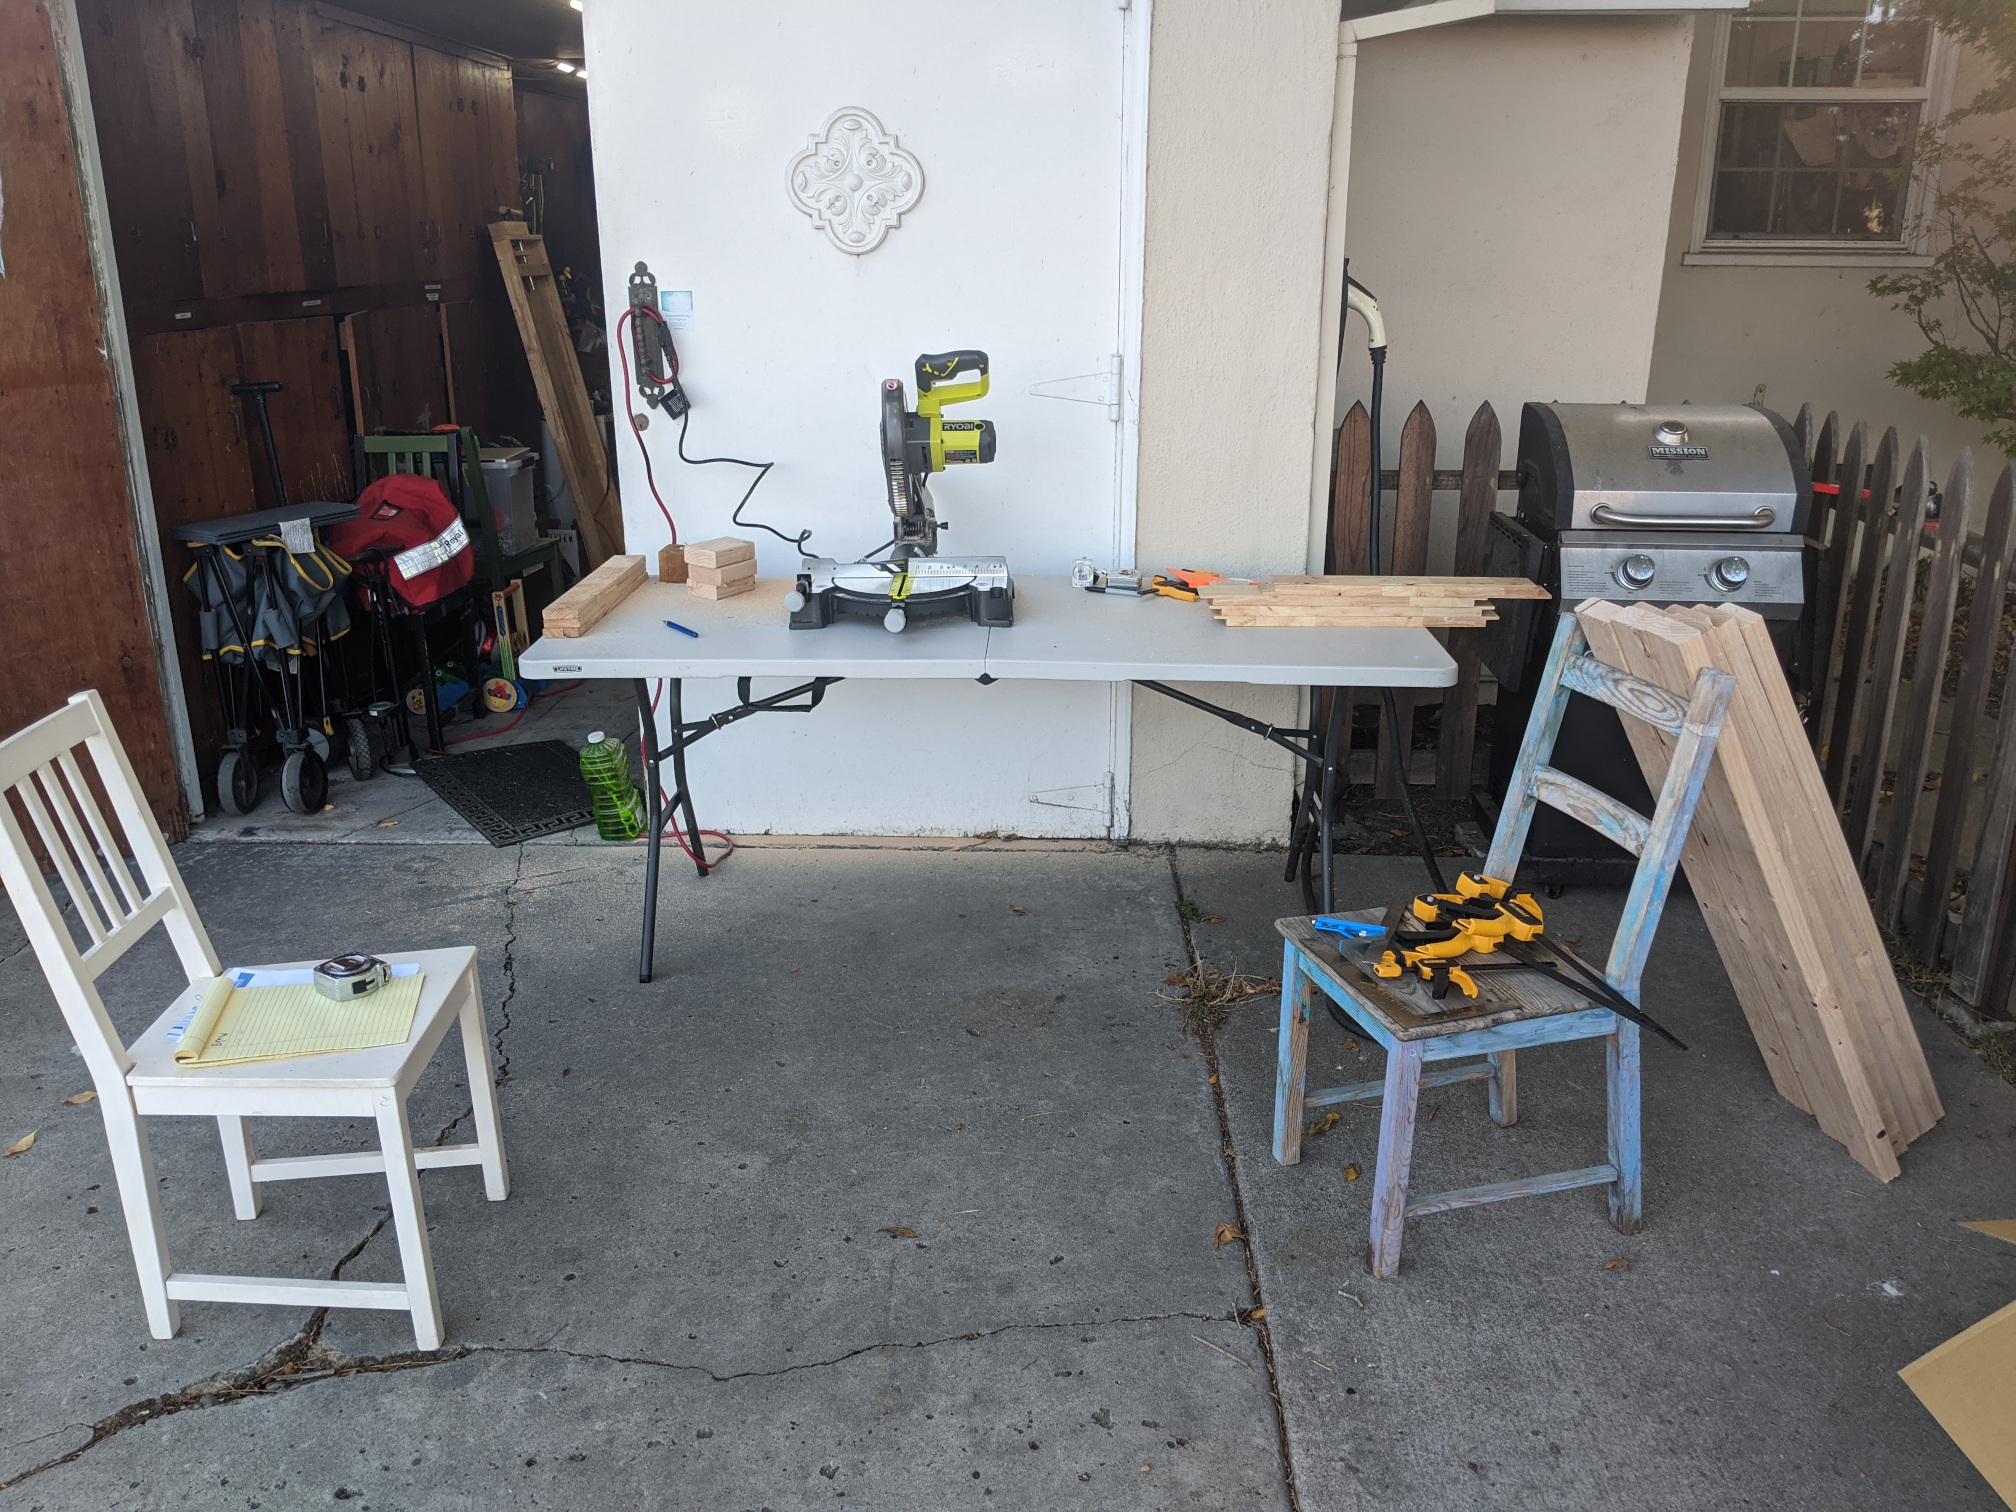
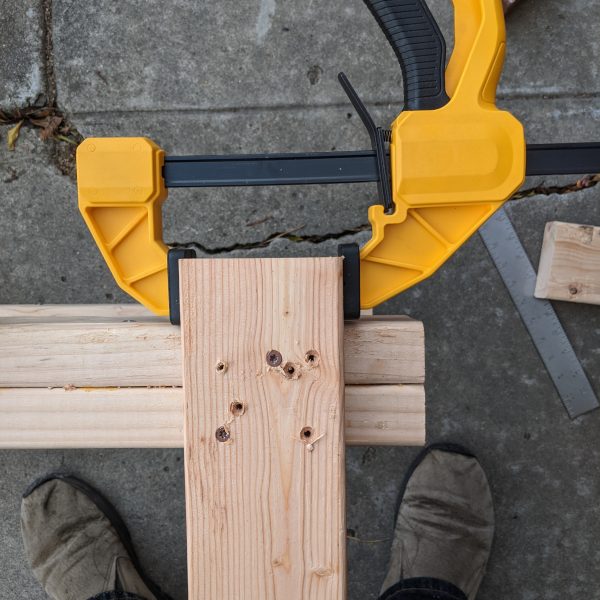
I am now about 2/3 of the way through the first day of building what Ramsey calls the BMW: Basic Mobile Workbench. The online course is nicely laid out, including diagrams, materials, how-to videos, and cross-references to skills. On my first day, I made a trip to Home Depot for supplies, but the actual work got hijacked by a busted kitchen faucet. Priorities! I spent time poring through the miter saw manual. Anything that can chop fingers off is worthy of a solid understanding.
A week later, today, I made another trip to Home Depot. Having reviewed the materials again during the week, I figured I could use clamps, squares, and, most critically, an extension cord. I carefully unpacked and assembled the miter saw, made myself comfortable with its operation, and got to work trimming 2x4s.

Bootstrapping a workbench: miter saw on a folding table in the driveway.
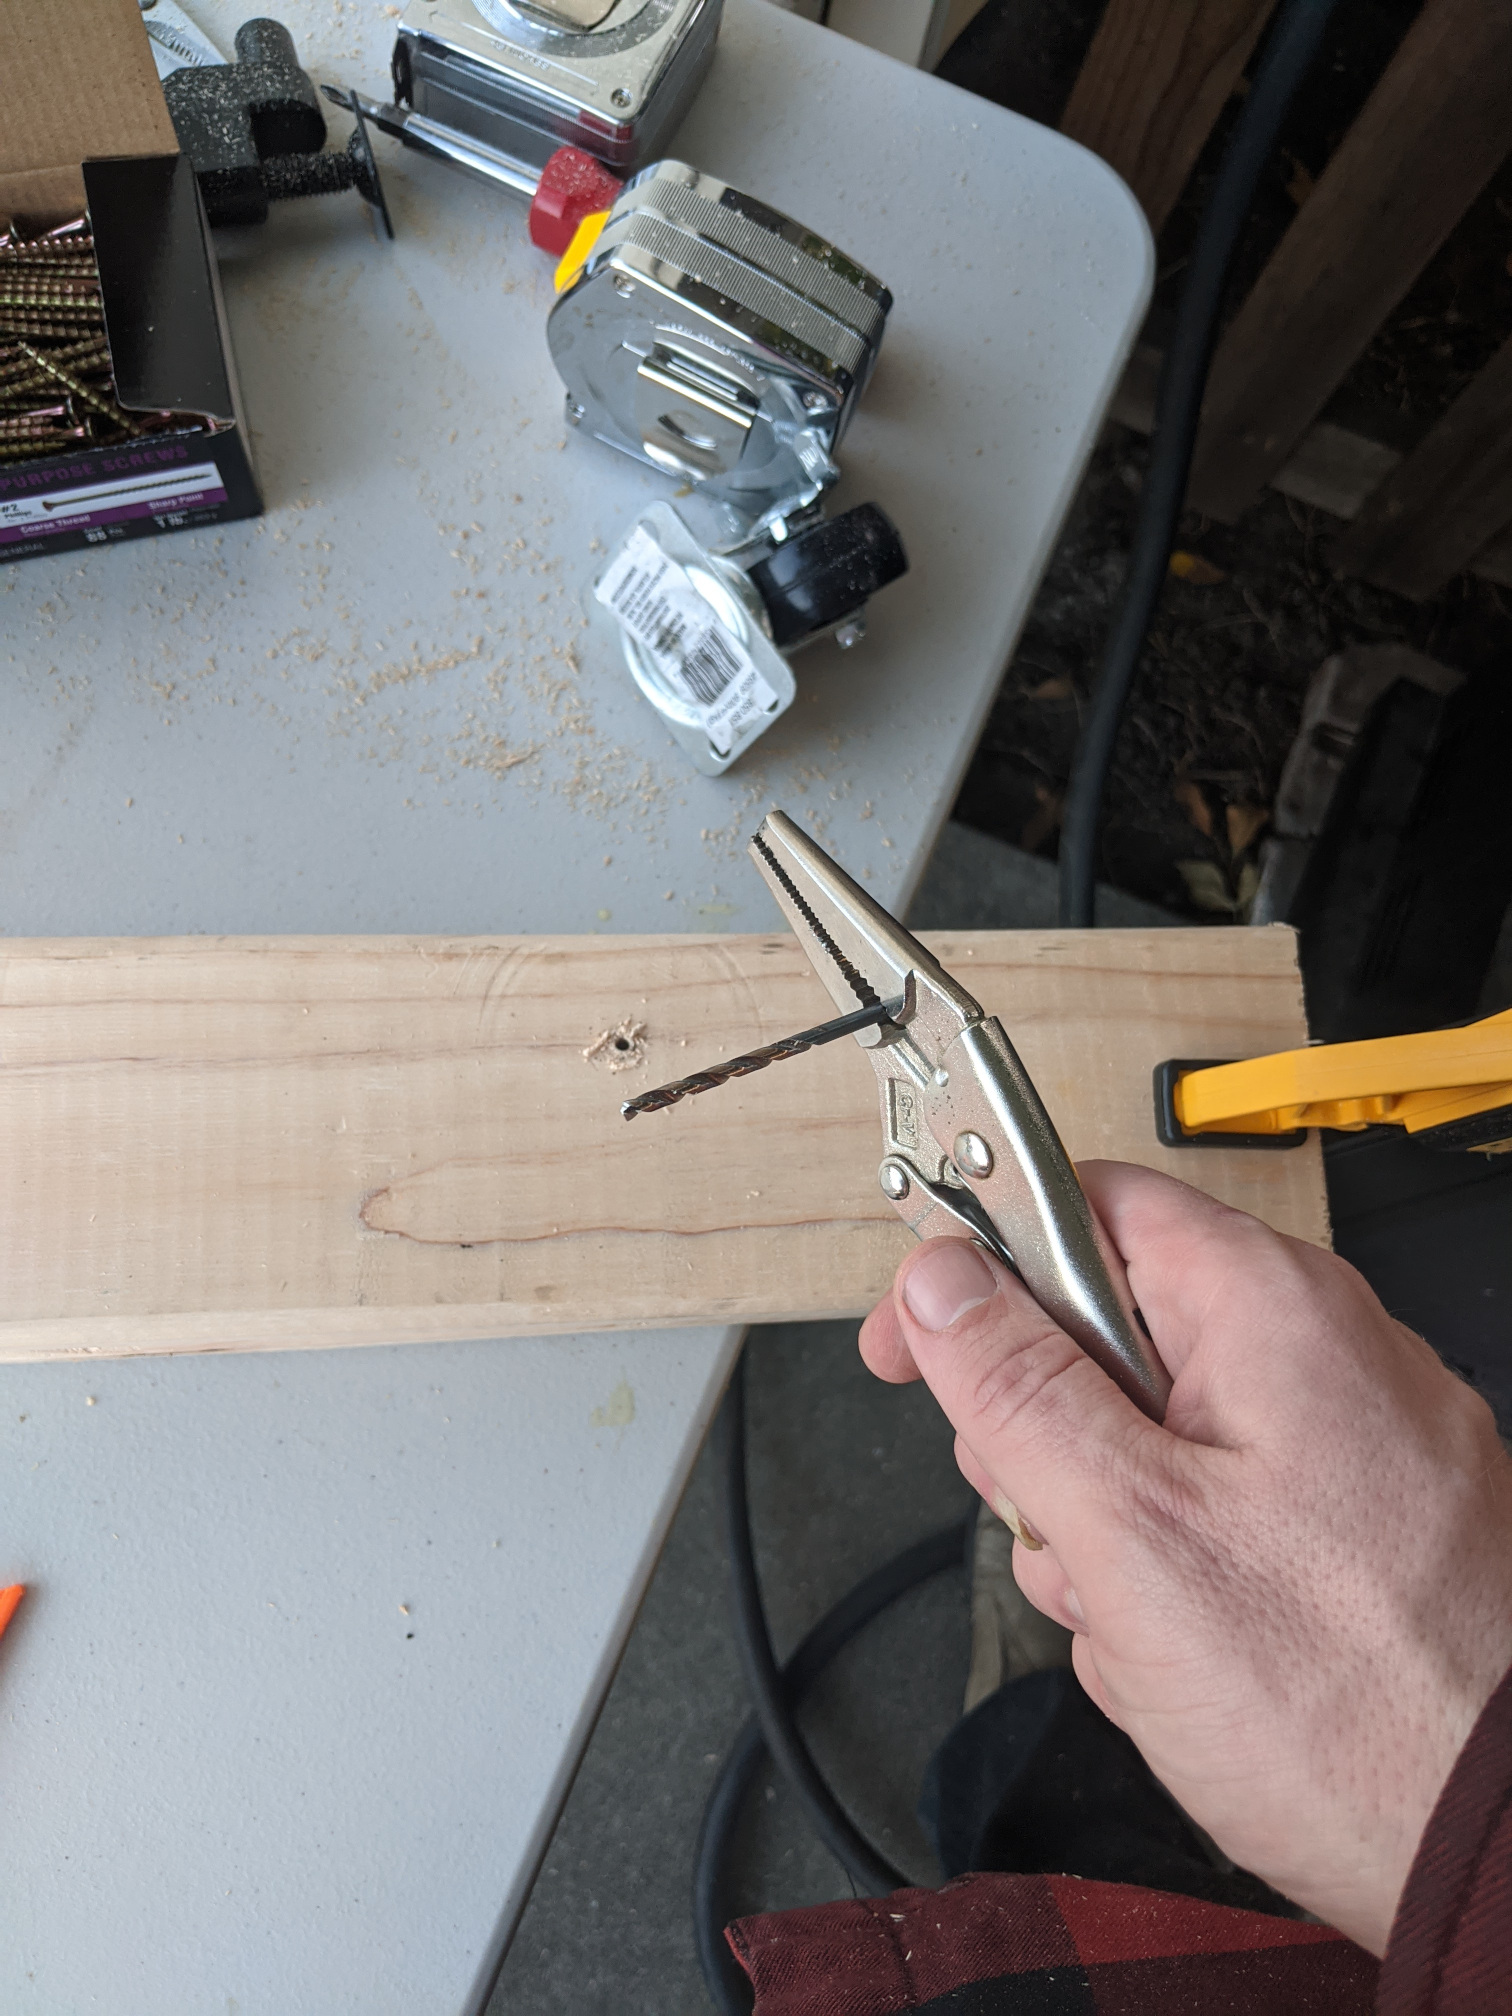
To build the legs, Steve glues two 2x4s together, then clamps them steady and secures them with screws. Things got frustrating when I tried to screw the 2x4s together. The screw wouldn’t go all the way in. Okay, I can drill a pilot hole. The drill bit got wedged in the wood. I worked it out with my vise grips.
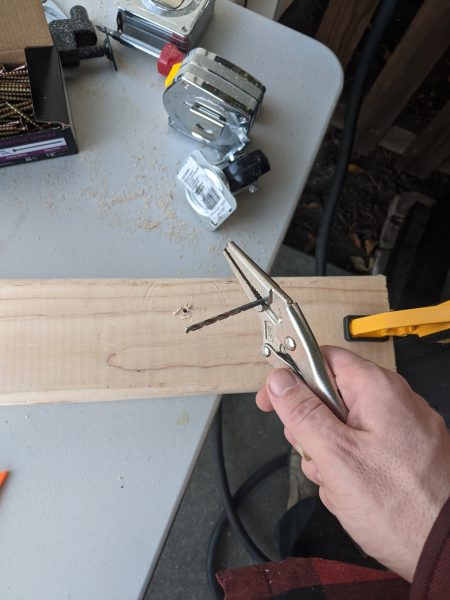
The humble vise grip is an indispensable tool!
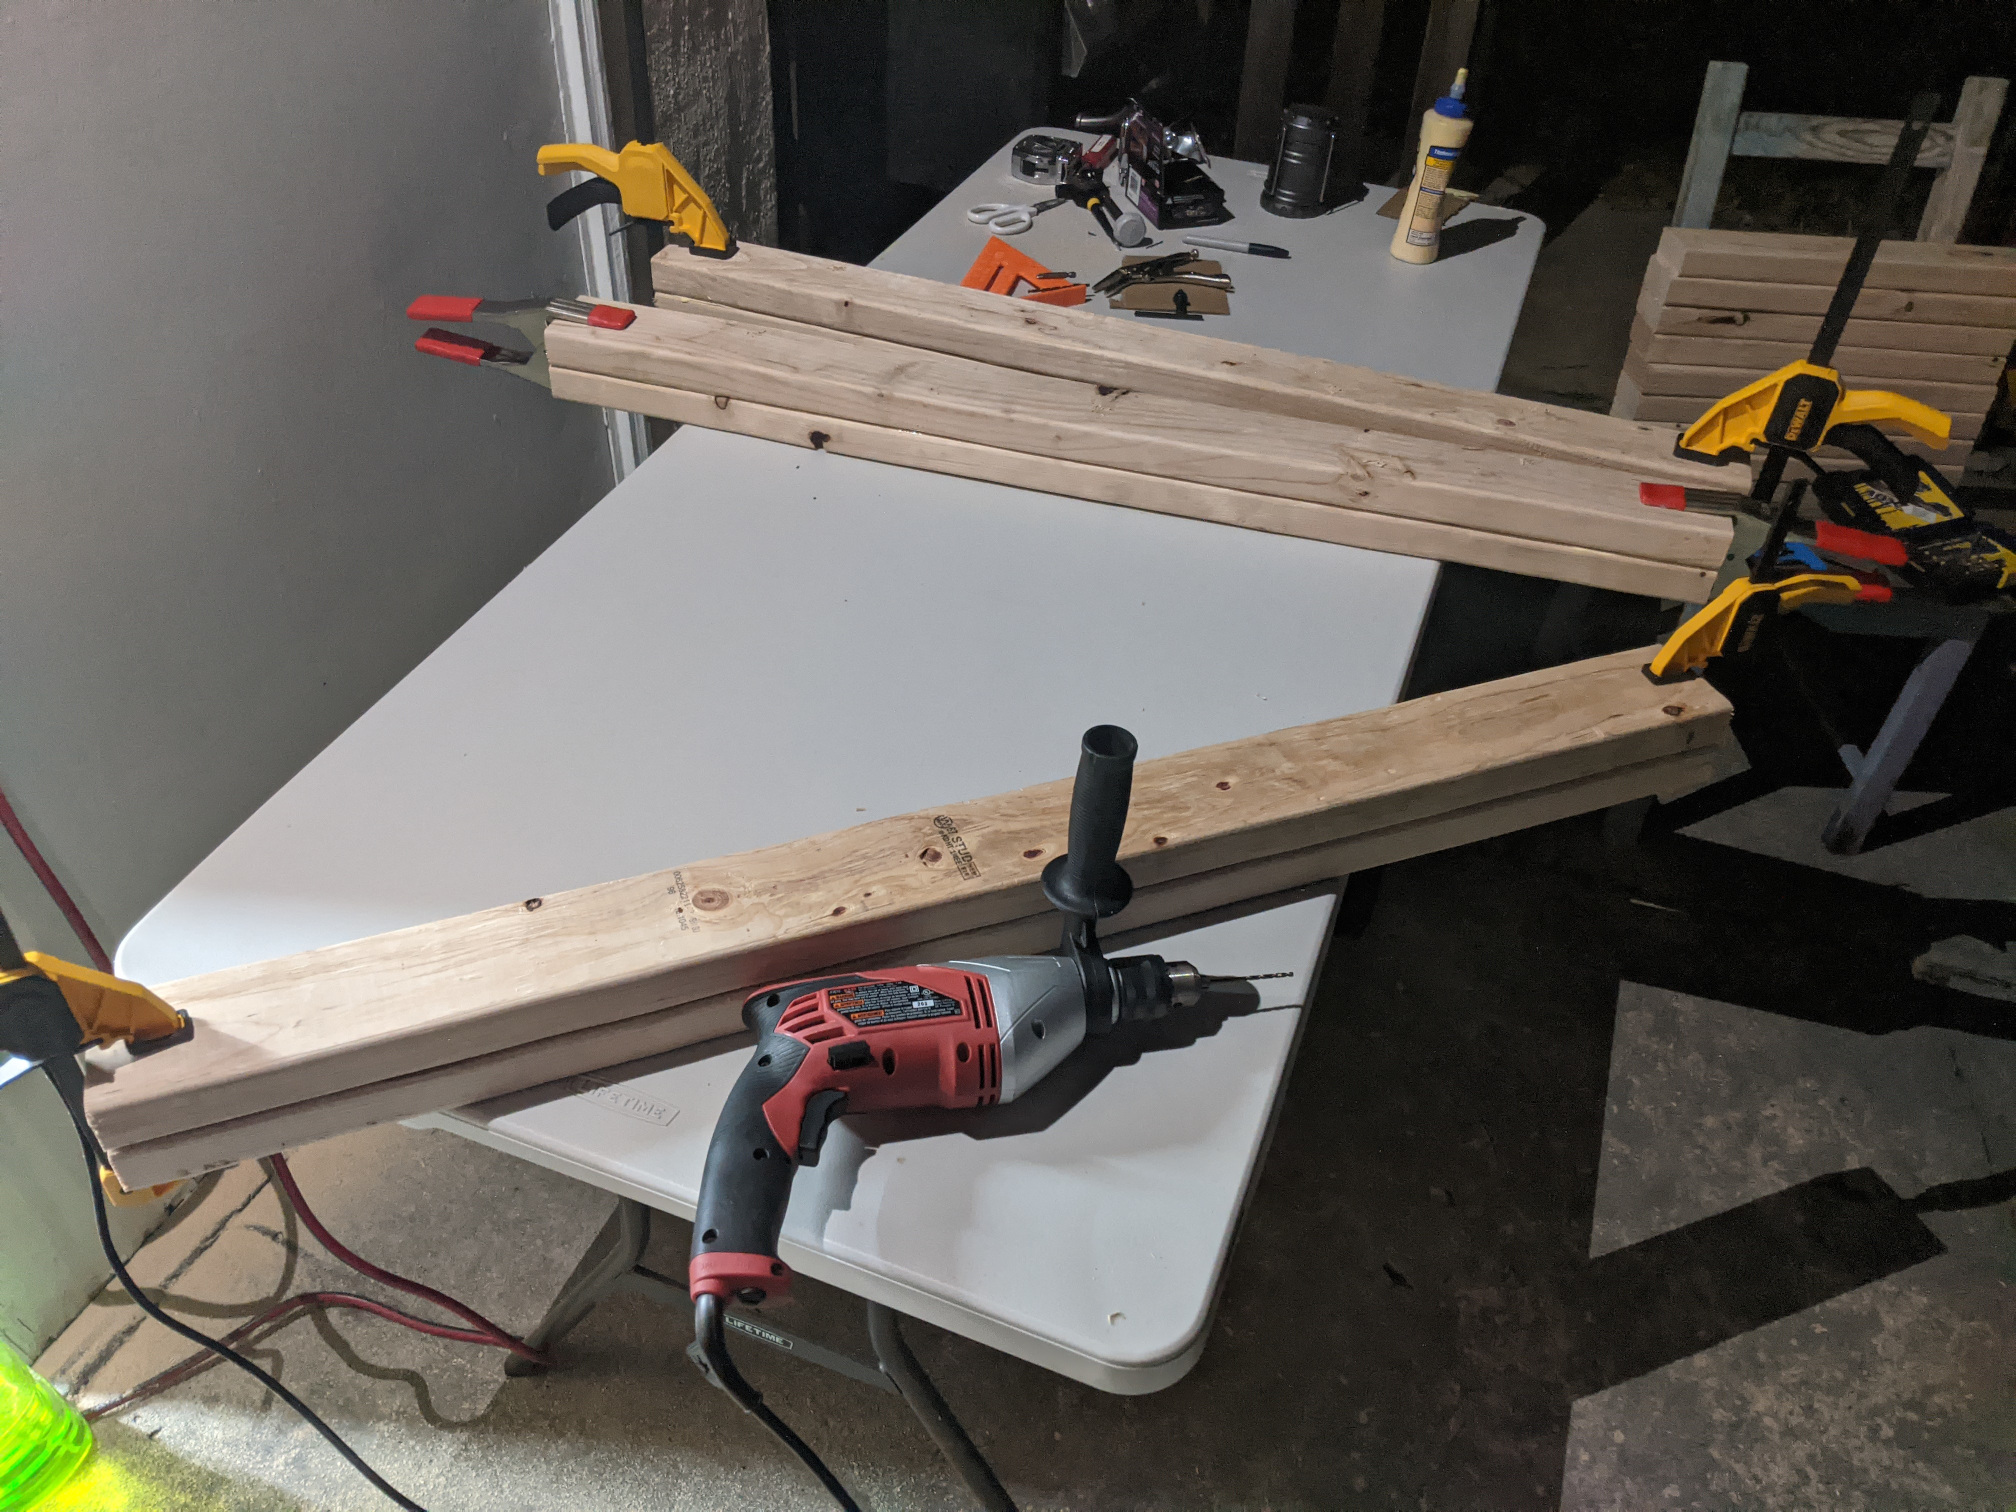
Google led me to a link that explained that one needs to tighten all the holes with the chuck to really secure the bit. That helped. Another video had a guy explain that in addition to a pilot hole, you want to drill a slightly larger hole through the top piece of wood. Experience proved this out. So, to drill a leg would require multiple bit changes. I was tempted to run to Home Depot for nicer tools, but it was getting dark. Fortunately, I had enough clamps that, after I struggled through the first leg, I could do the next three legs in a batch. I only had to swap bits three times for the batch instead of for each leg.
Ramsey touches on most of this information in his course material. He shows how he uses some fancy star-bit screws and links to a video that explains how to screw things and what a wonderful thing an impact driver is. I thought maybe his materials could be more explicit: “you should really consider an impact driver, and these cool star bit screws.” However, I appreciate that all the information isn’t served to me on a silver platter. An important part of building things is overcoming challenges along the way. And in an age where many basic problems are quickly solved by asking a smartphone, working through an efficient process to get the legs drilled “the hard way” was very rewarding.
What one lacks in fancy tools, one can make up for with a degree of cleverness.
The Silver Platter was a concern I had with learning basics at a professional woodshop. “Here kid, take this fancy wood we got you and run it through the planar like so before we get to the nice Saw Stop table saw. We’ll make sure you folks get to use the drill press, too!” That is a nice way to put your toe in the water and taste the possibilities, but I am not going to have all of these things in my little garage, so … Steve’s course has the first few projects relying on the miter saw. At the end of the day, the online course puts more responsibility on me as a student. It is more daunting than an off-site shop class, but it teaches me more of what I really need and want to know.
Since I am a Tall Dude, I made my legs longer than in Steve’s plans. I started with 44″, but after squaring off the leg ends, I had to settle for 43 1/2″. This means I need to pick up one more 2×4 to finish off the frame. While I am at the store, that might be a good time to pick up an impact driver, possibly even some fancy star screws.
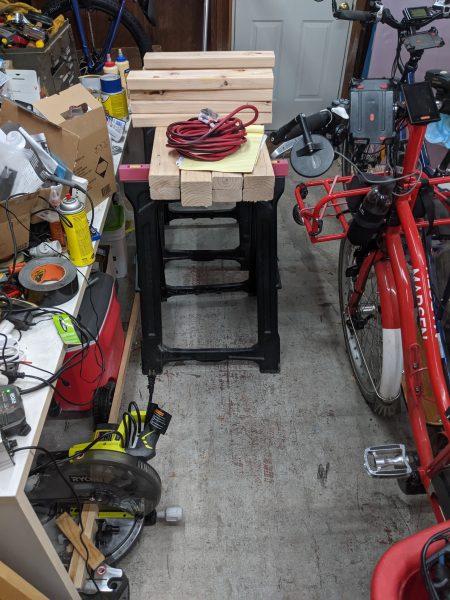
The garage is a mess, but the BMW project is stacked nicely for the next work session.
As I said, it was getting dark, and my better half had dinner cooking. I couldn’t finish the “Day One” process of screwing the frame of the workbench together, and it will probably be another week before I can pick this up again. I stashed everything neatly away, and I am looking forward to finishing off my first project … before the year is done, for sure!
Feedback Welcome
Link:
https://dannyman.toldme.com/2020/11/22/basic-mobile-workbench-day-1/
It has been two trips to Home Depot. I picked up an impact driver combo set and a 2×4 on my first trip. For the second trip, I realized that I needed yet another 2×4 and that quarantine has become a growing possibility, so I grabbed the lumber for the next two projects, in addition to some star-bit hex screws.
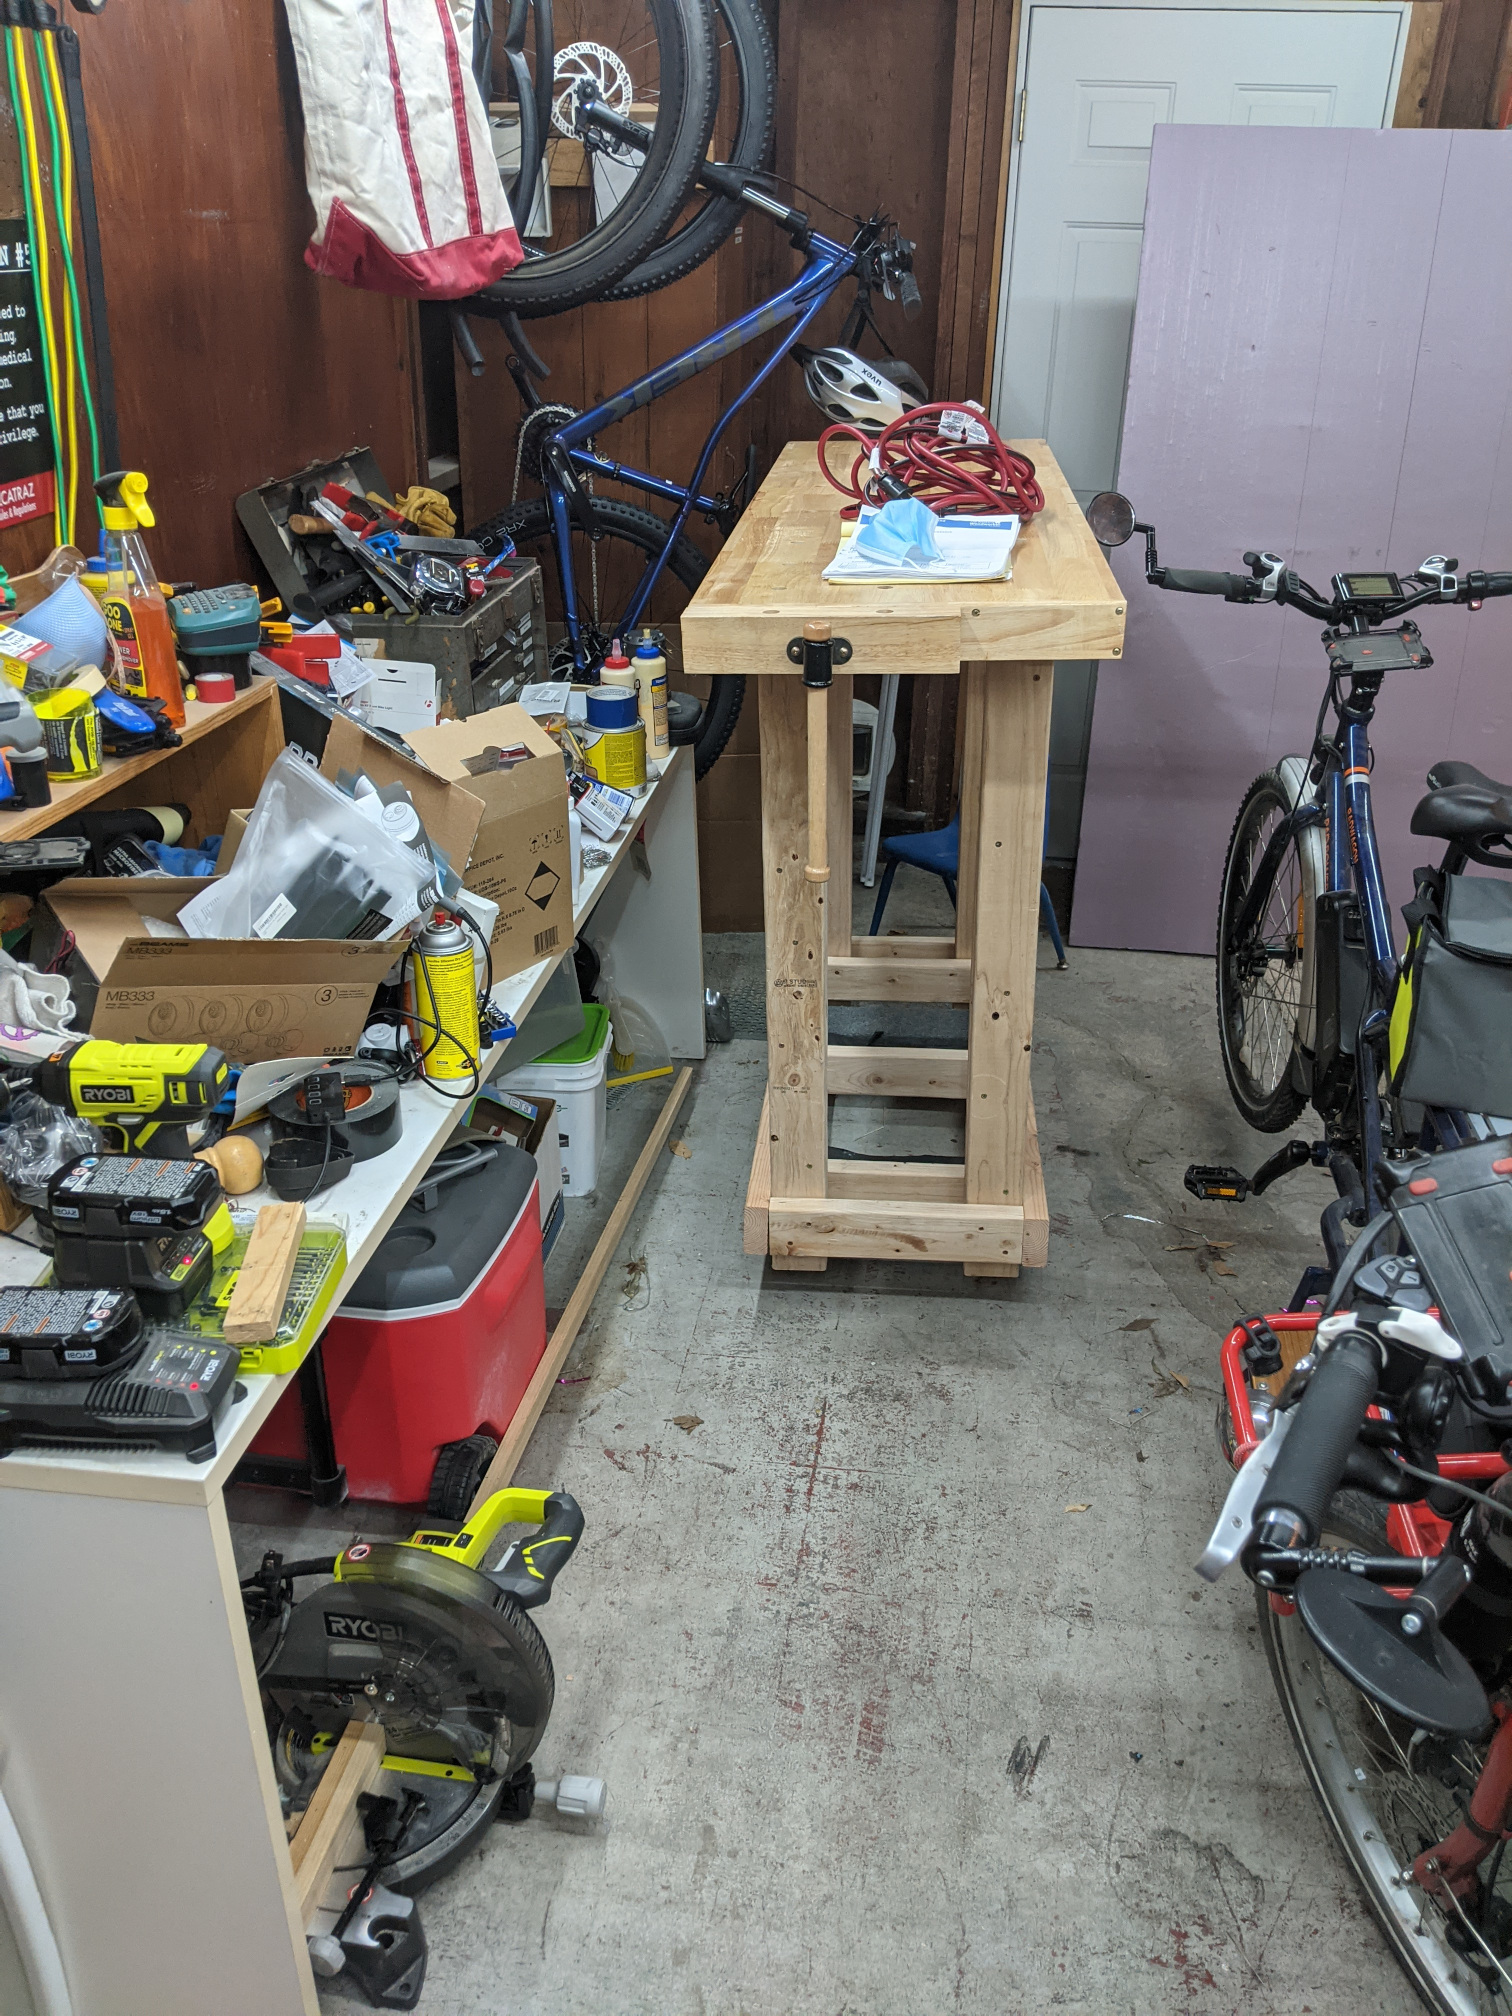
Saturday afternoon was blessed with some pretty nice weather, so I set up shop in the driveway again. But before I tell you that story, I’ll tell a brief story. A few years back, this dad had younger children and even less free time and decided he’d be best off ordering a workbench kit online. The box showed up in pieces, and the Amazon merchant was sufficiently inept about making it right that Amazon gave me a full refund, and I was left with half a workbench kit. The various bits were nice enough that they’ve been sitting in the garage for a few years. This is a long way of saying I had a nice top for the workbench, and I have adapted Steve’s plans to fit that top. And free up a little room in the garage, which is one of the big objectives here.
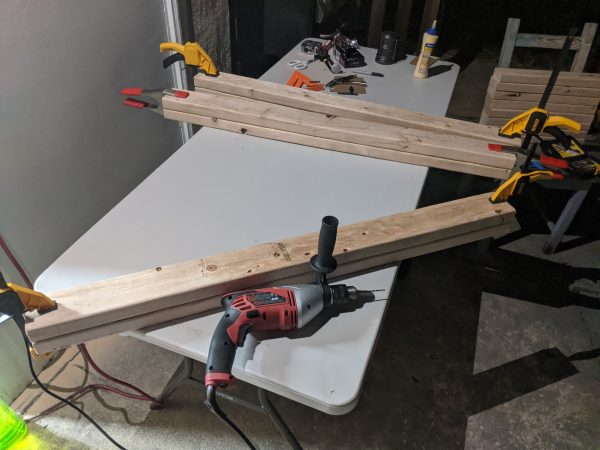
Last time around, I had cut the cross pieces to 18 10/16″ to fit the workbench top. Between that and cutting longer legs to suit my preferred working height, I had used up all the 2x4s, so I needed another piece for the stretcher beams. Then I realized the cross pieces sit within the stretchers, and I had to trim each cross piece by 3″. Oh, and that I’d need another 2×4 because there are also stretchers at the bottom. All that’s to say that mistakes were made and material wasted. Price of education, I guess.
I chopped several 2x4s. I noticed that not all the cuts were perfectly square, thanks in part, I believe, to an imperfect fence. Close enough for now. I also noticed that the boards are … not perfect. So, I spent a little more energy checking the cross pieces and flipping them to whatever orientation fit the fence most flush. Education.
Then I got to screwing the legs together. Last time I had to drill two holes before sinking the screw. This time, with the impact driver and a set of star-bit deck screws, the drills went into the wood like a knife through warm butter. The deck screws have their own nuance. At first, I have to try and hold them straight as they get started in the wood. After a bit, they tend to sink right in a way, and at the end, the impact drill makes its impact drill noise, and I can get the head just under the wood. Ahhh, flush!
And no more wrestling with a chuck key.
The first corner of the leg assembly is easy enough: make the pieces square, hold them firm, and drive the screws straight. As you get toward the fourth corner, the job gets trickier: lining pieces up square and flush and holding them in the right place gets trickier. On one corner, whenever the screw made it through, it would shove the piece over a bit. Steve makes it look easy, but this mere mortal got to busting out the clamps to help get pieces squared and held still.
You can see this corner put up a fight, until I got a clamp involved.
When assembling the frame, I needed to really push the legs apart to host the last stretcher. A neighbor came by and suggested using a shim to give the clamp something to grip. Finally, the frame was together, and the top just popped right on top, easy, and sufficiently snug.

The stretcher wanted to move in the direction of the blue arrow. The clamps, with the help of a shim, held things right.
I can see all the imperfections. On the one hand, imperfections are kind of a bummer. On the other hand, anyone who creates something tends to have the best awareness of their own imperfections. Fair enough. But more than that: I’m learning. Nobody starts perfectly. The workbench is good enough.

Solid enough but damn these gaps!
The other thing that raises a brow is just how high I’ve built the workbench. I had held my forearms out at 90 degrees and measured the height from there. 46″ is high, and that’s where I set my standing desk when standing. I don’t like bending over. Two open questions are: is a comfortable standing desk height also a comfortable workbench height, and is this narrow workbench going to be stable at this height? The neighbor and I discussed how best one might trim 2″ off the legs beneath the bottom brace. Time will tell.

The workbench will replace the white table on the left. It needs to store some of the more useful stuff there. This will free up enough room to hang another bicycle.
When screwing in the cross pieces, Steve explained why his design has five at the bottom and three at the top. For one, the bottom has to hold the shelves’ weight, but for another, more cross pieces at the bottom lower the center of gravity.
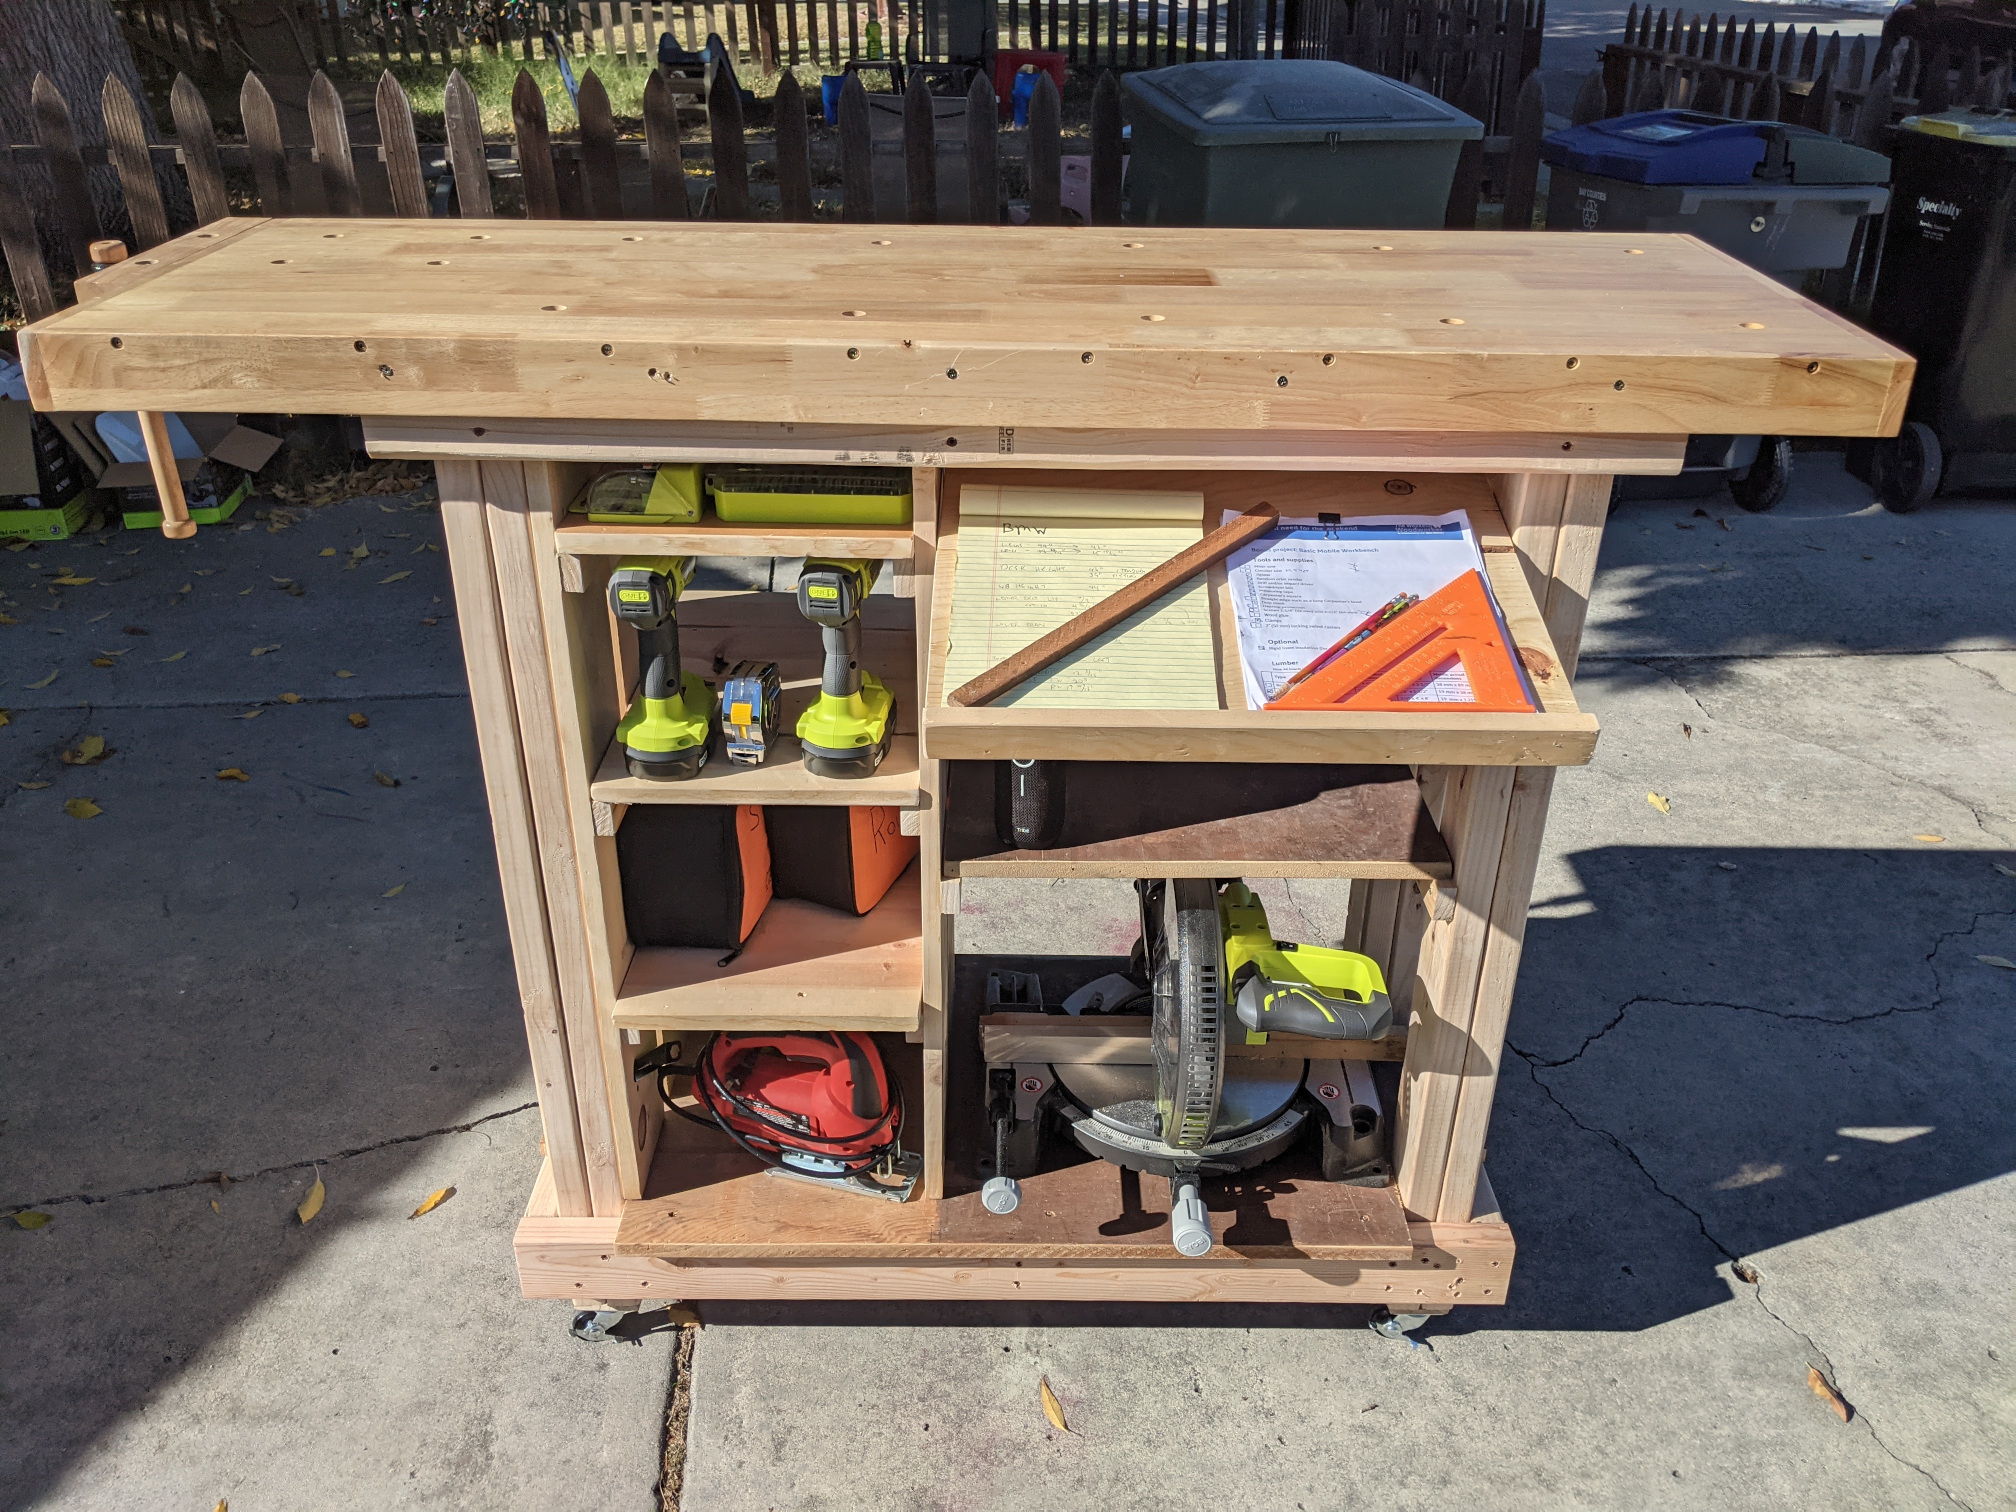
For Day Two, Ramsey’s plans call for cutting up a plywood sheet with a circular saw to build shelving and a workbench top. I already have a workbench top and a cache of dimensional lumber, so I will take my own approach to the bottom shelving. One thing to think over is what do I want to store in the workbench—heavier stuff at the bottom. The workbench kit I had came with some nice, felted drawer bottoms, but half the drawer pieces are missing. I’ll probably just do open shelving and throw in a good number of 1×2″ shims to allow for adjusting the shelf heights.
Feedback Welcome
Link:
https://dannyman.toldme.com/2020/11/25/basic-mobile-workbench-day-2-3-4/
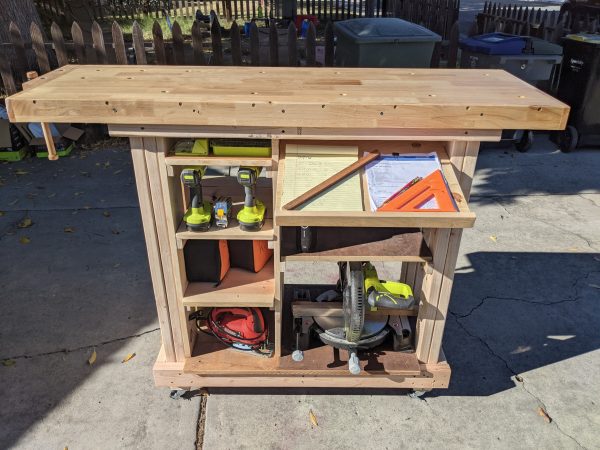
It took a few days, a few hours each day, but I completed “day 2” of my first Steve Ramsey build: the Basic Mobile Workbench.
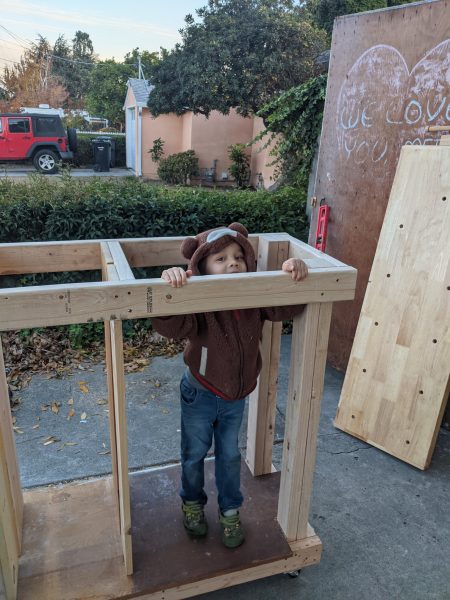
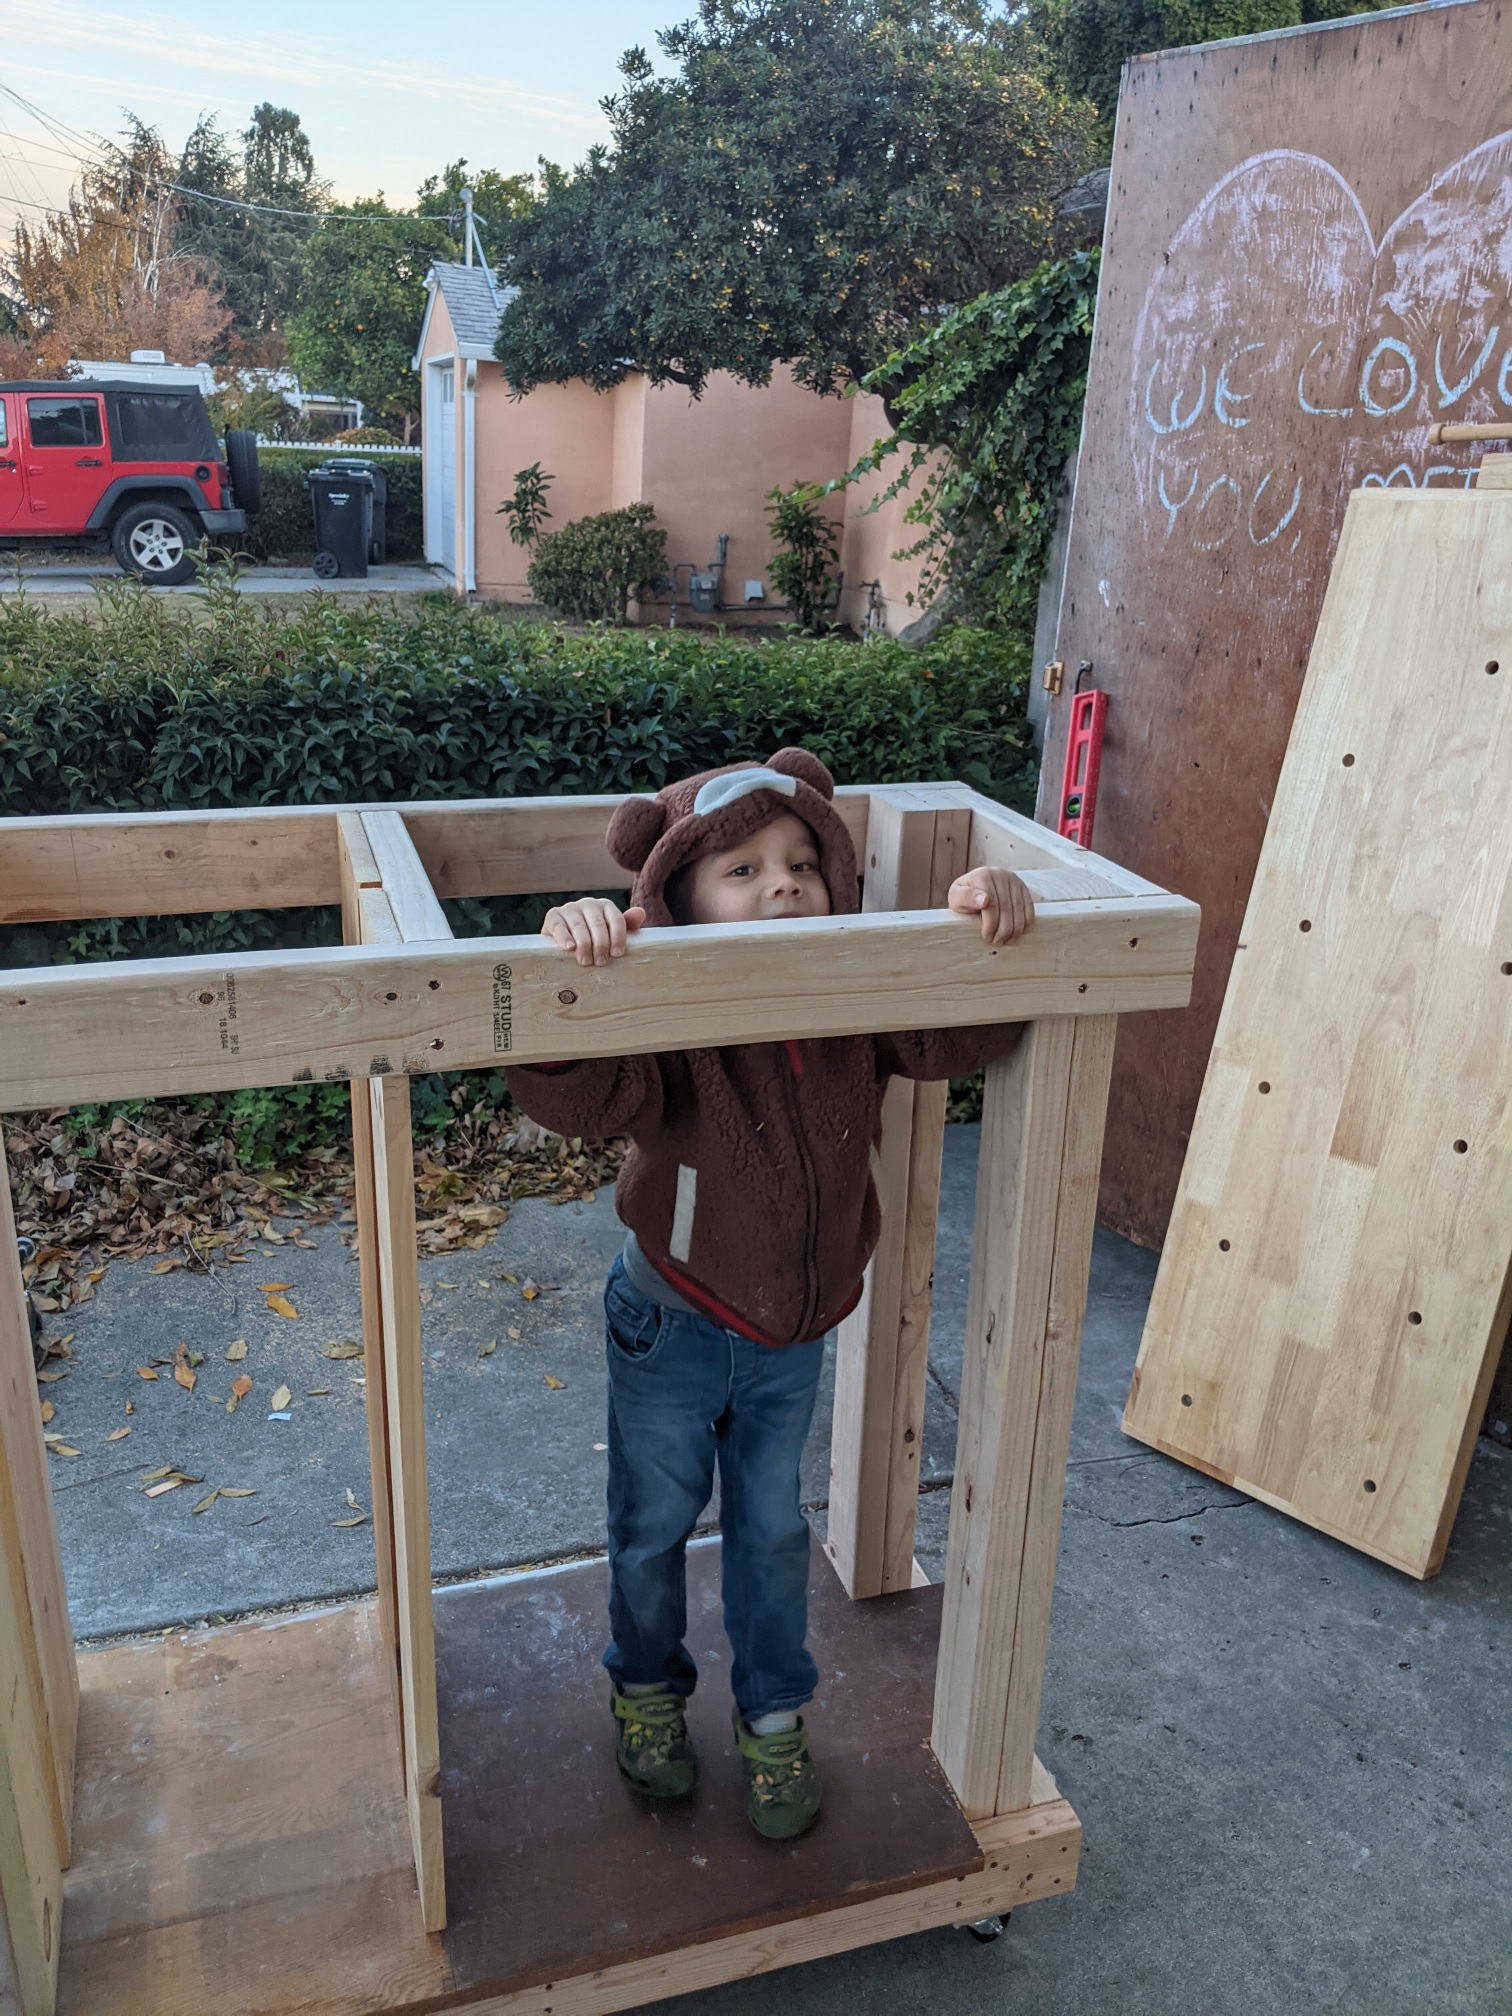
We keep the kids away from the power tools.
The first thing anyone notices is that my workbench is unusually tall. I built it to the same height I set my standing desk and so far, I like it. (I am unusually tall.) Instead of the hassle of wrestling a sheet of plywood and the intimidation of breaking up a sheet of plywood with a circular saw, I nibbled through a pile of wood that has been accumulating in my garage and spent some zen time cutting with a nice hand saw. (As Leah Bolden says: “you can do this!”) The bottom shelf was this old board that changes color and had a line drawn in a decent spot. I resized it with a handsaw and cut out the corners with a jigsaw.

For the longest cut, I set up a simple jig.
I built the interior shelving with scrap wood. I had a lot of 1×12 laying around. For the shelves, I glued two 1×12 boards together. I don’t have a clamp wide enough for the job so I improvised with some bungee. Some of my 1x12s had a 1×2 lip tacked along the side, from a project I abandoned years ago. I thought I might preserve the lip for the shelving, but my first attempt to saw through the assembled pieces met with a nail. Good thing I was rocking the hand saw, I guess.
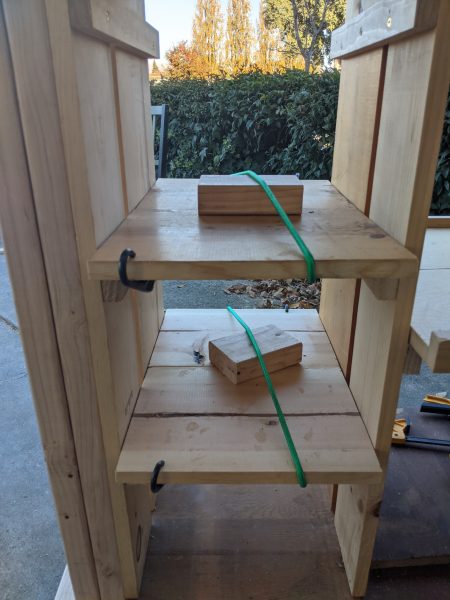
Some problems can be fixed with a Home Depot run, and sometimes you just have to improvise. The join here isn’t going to hold much weight, so this should work fine.
With the wider shelves, for one I used the remainder of the wood that I had used for the bottom plate, and for the other, I managed to retain the lip on some 1×12, and at the end discovered that the shelf slides out then angles and wedges in a nice spot to hold plans!
TADA!
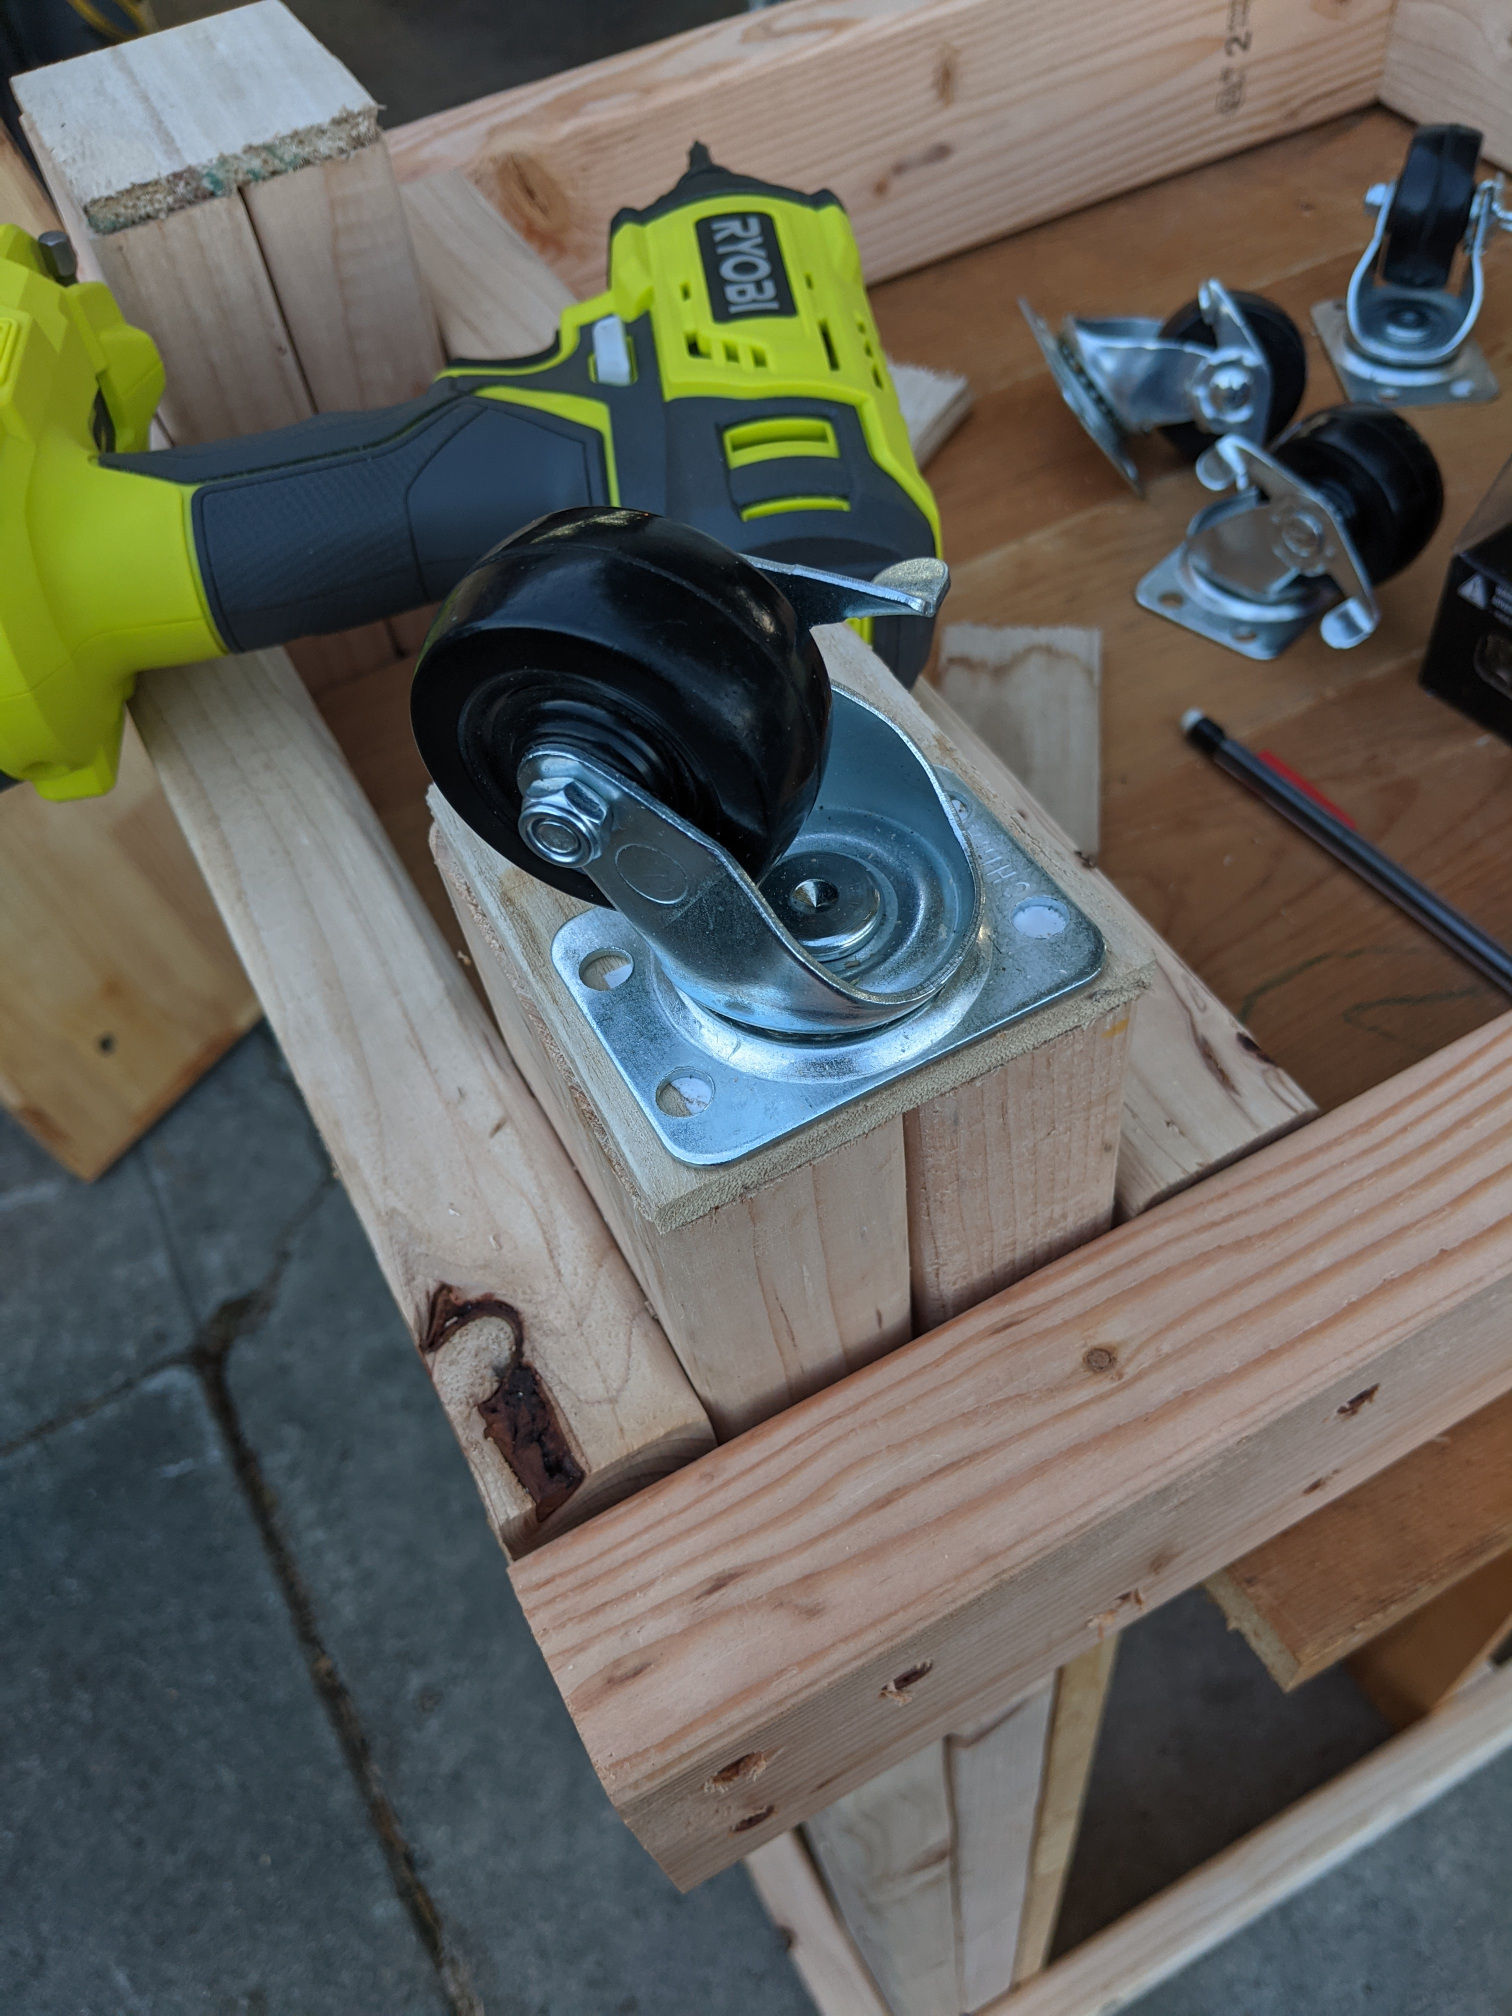
Part of the challenge is that my driveway and the garage are not flat or level. When doing the shelves I took to checking how “level” the bottom board was, then lined up the shelf supports based on that concept of level. Since they are drilled into end-grain, I took an old board that Tommy broke for taekwondo and used that to add a cross-grain buffer for the casters. I have no idea if this is wise or not. Since my floor is, shall we say, rugged, the basic casters from Steve’s plans feel rinky dink. Perhaps in the future, I’ll upgrade them.
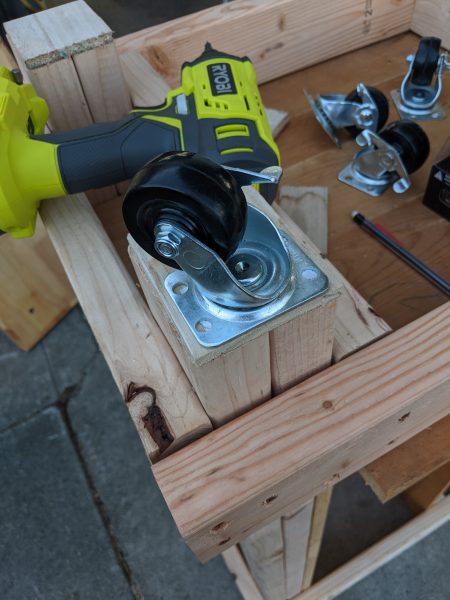
This little buffer place on the bottom of the leg may or may not ensure stability for the caster.
Next project: clean the garage out a little more so I can get started on Steve’s actual six-project course!
Feedback Welcome
Link:
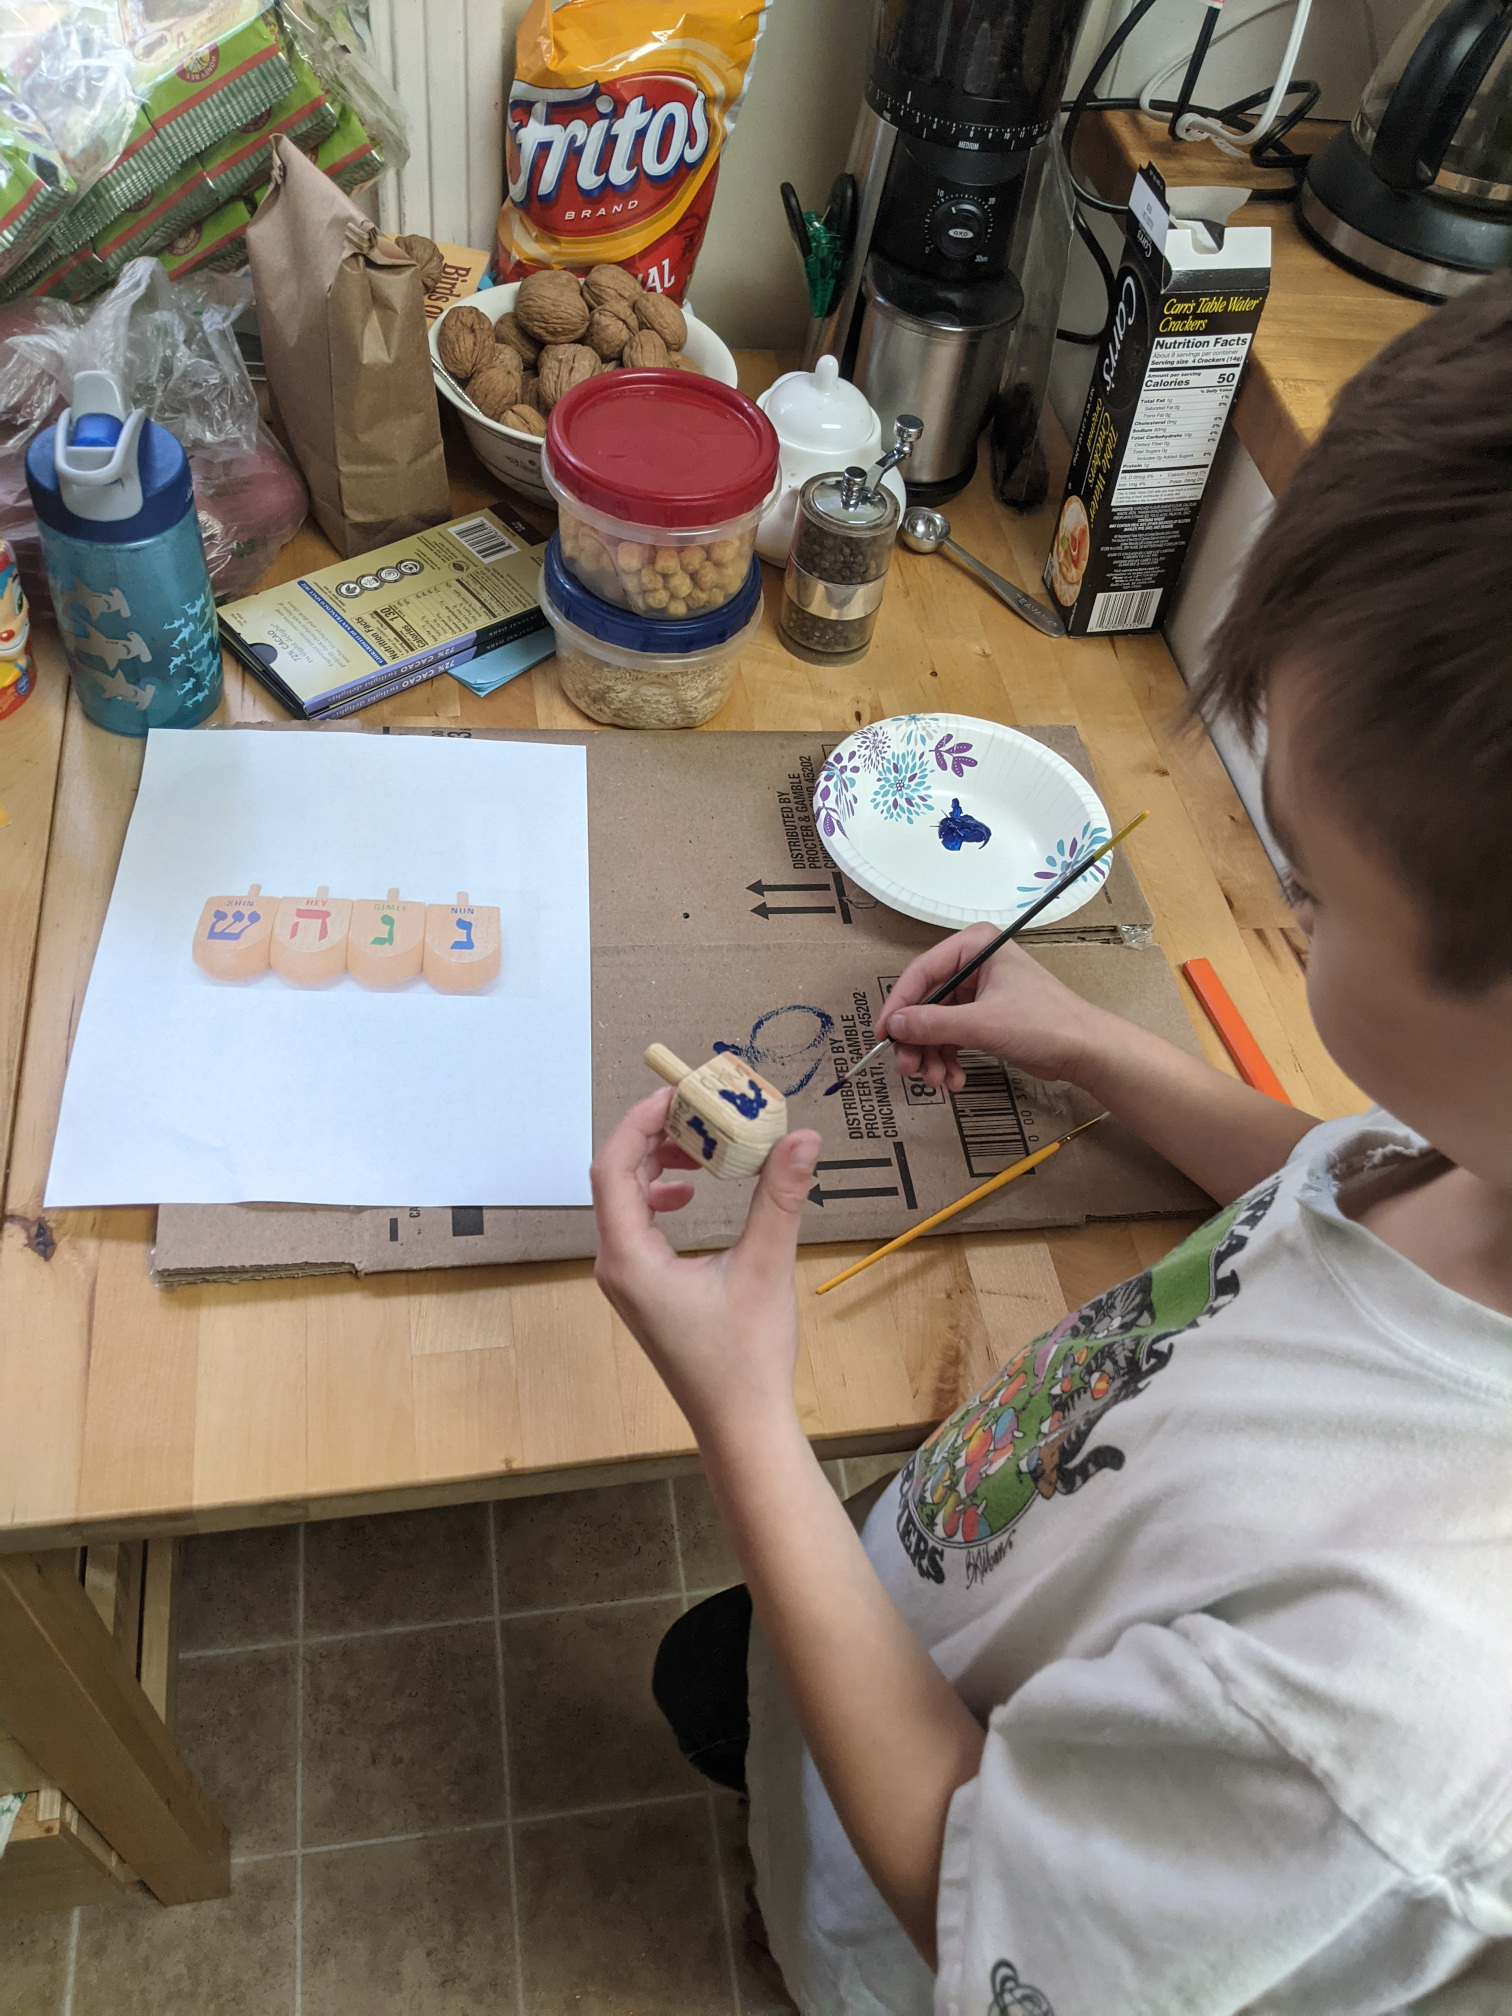
https://dannyman.toldme.com/2020/12/16/oh-dreidel/
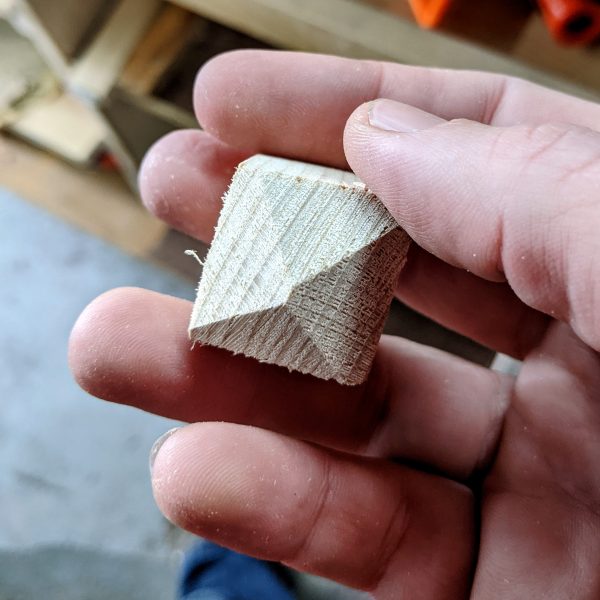
Here in 2020, I share an office with my second-grade son. This morning they were talking about Hannukah and making paper dreidels. He got frustrated making his paper dreidel. After lunch, I tried my hand at making a scrap wood dreidel. I used the miter saw to cut a 1×1 stick of wood, then mitered one end into a top. A 1×1 is too small to clamp in a miter saw, and I wasn’t going to stick my hand that close, so I used a “push stick” to hold the piece in place as I mitered it out.
“Oh dreidel, dreidel, dreidel, I miter sawed you out today!”
Of course, imperfections can be fixed with the miracle of sanding. “I made it out of clay,” I kept thinking as I sanded it down.

“Oh dreidel, dreidel, dreidel, I sanded you this way!”
I popped the top into a bench vise and carefully drilled out a hole. A drop of glue and a dowel rod and the boy had a dreidel. I set him up to paint the letters on. He was a little underwhelmed with the quality of his first time painting Hebrew letters on a small wooden object, but I assured him the point of making a dreidel wasn’t to be perfect but to have a simple toy with which to play.
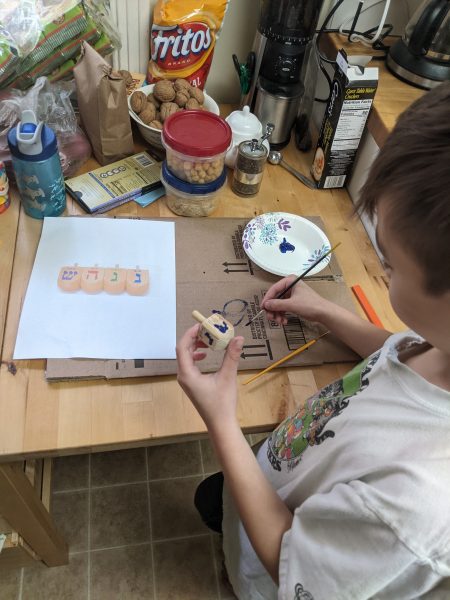
“When it was dry and ready, with the dreidel he did play!”
Through the afternoon, he practiced his top spinning technique.
Feedback Welcome